Clone a GitLab Project
This tutorial will walk you through adding an SSH Key to your GitLab account and cloning a GitLab private repository in a Sophos Factory pipeline.
This tutorial assumes you already have:
- A GitLab account
- Access to a GitLab private repository
- A Sophos Factory account, project, and pipeline already created
Step 1: Add a Public Key to Your GitLab Account
Generate a suitable SSH key pair.
The best method for generating a key pair will vary depending on your operating system. See the following articles for more information:
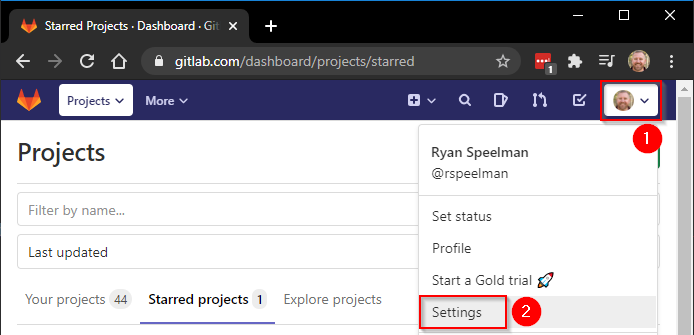
Log in to GitLab, click on the “Account Menu” at the top right and select “Settings”.
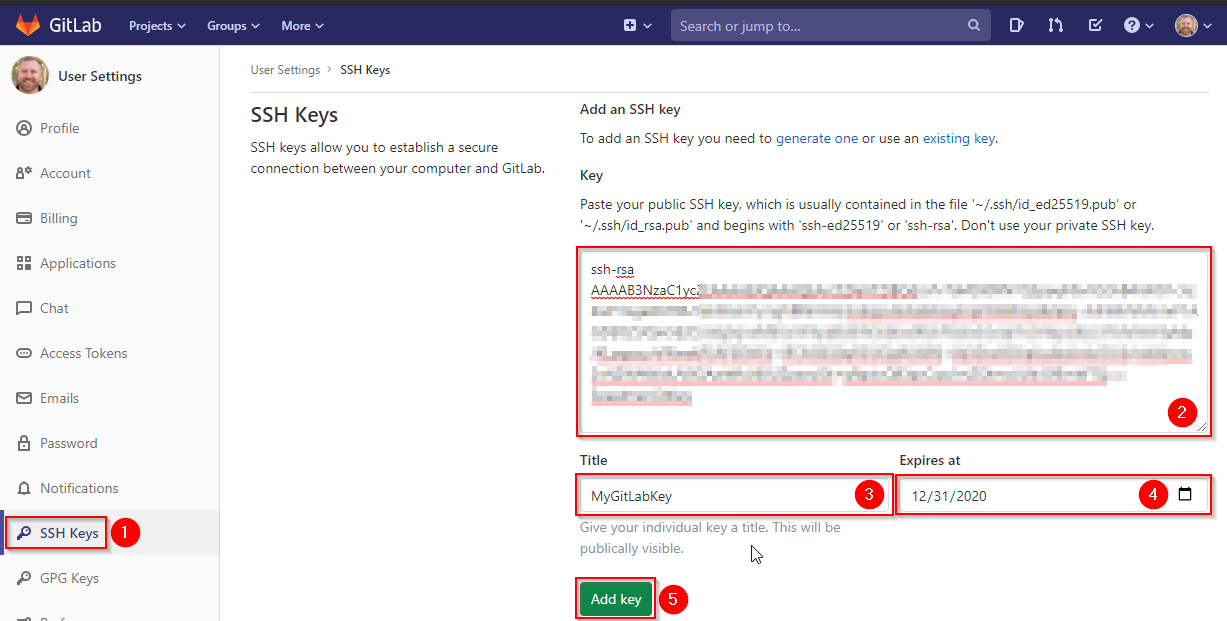
Copy and paste the public key generated previously into GitLab:
Step 2: Add a New Credential to a Sophos Factory Project
In your Sophos Factory project, click on the “Credentials” on left navigation. Click “New Credential”, and proceed to create a new credential of the type “Built-in: SSH Private Key”.
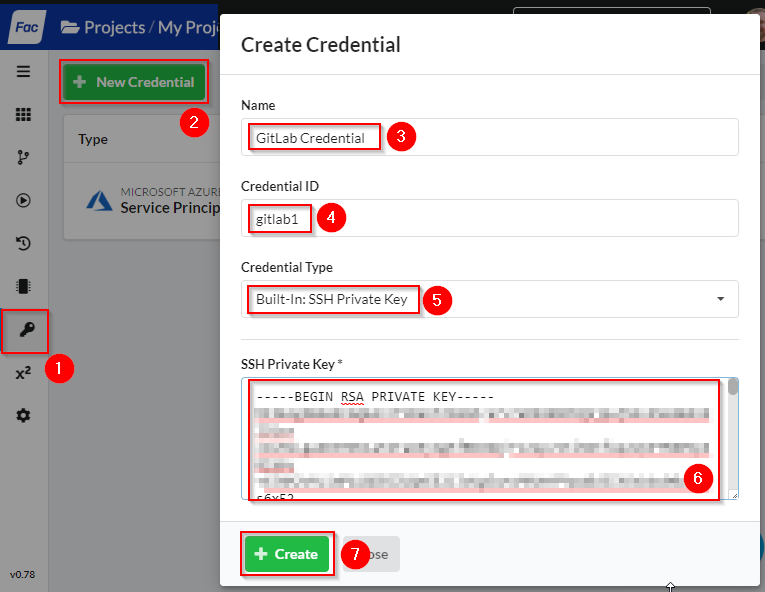
Copy and paste the private key generated previously into the SSH Private Key field.
Step 3: Create a Credential Variable in your pipeline
- Navigate to your pipeline and click “Open in Builder”.
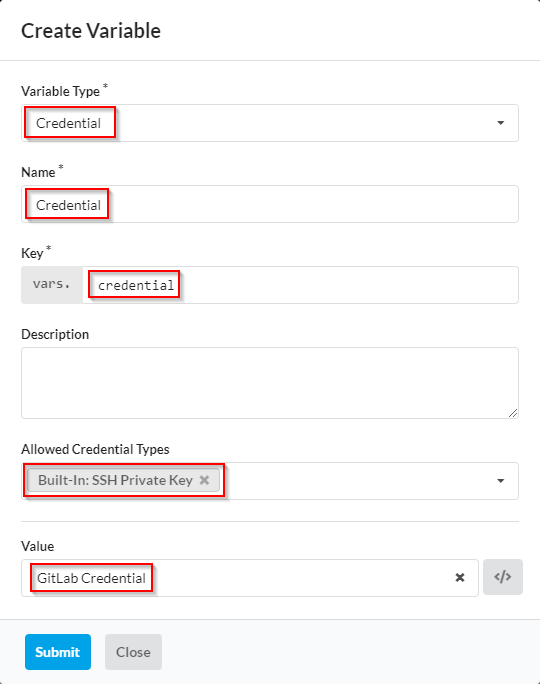
- Choose the “Variables” button at the top right and click the “Add Variable” button. Ensure Variable Type is Credential and Allowed Credential Type is Built-in: SSH Private Key.
Optionally, you can select the new credential you created in the previous step as the value for this variable.
Step 4: Add Additional Variables
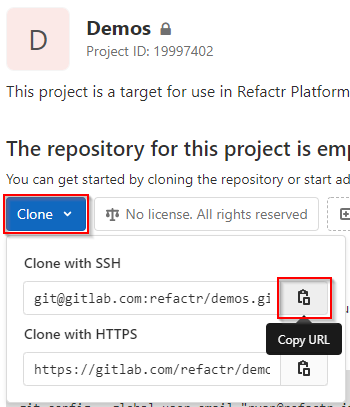
In GitLab, navigate to the repository you wish to clone, and copy the SSH URL.
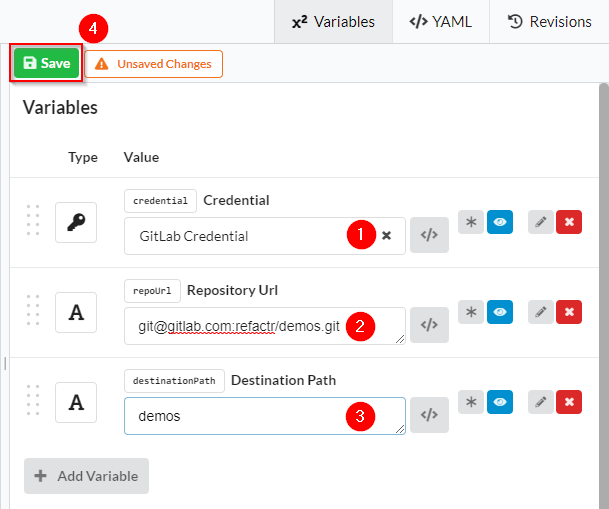
Switch back the the “Variables” tab in your Sophos Factory pipeline and add the additional variables as shown in the image below. Paste the SSH URL from GitLab into the value for the Repository URL. Make sure to save when you are done!
Step 5: Add and configure a Git Step
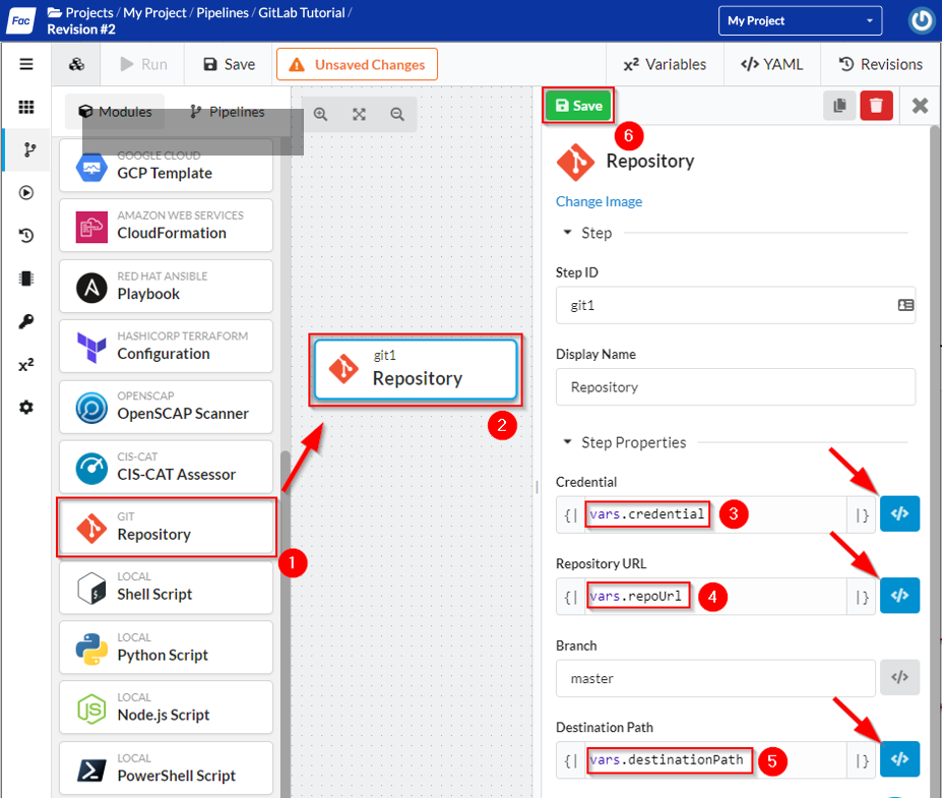
To add a Git Step Module into your pipeline:
- Drag it into the builder from the list of step modules on the left pane.
- Click on the new step in the builder and the step properties form will appear on the right.
- Update the fields as shown in the image below. Be sure to toggle each of them to Expression Mode because we are using variables for values.
- click “Save” at the top of the step form.
Step 6: Save the pipeline
Click “Save” at the top left of the builder and a “Save Pipeline” dialog box will appear. Enter revision notes, and then click “Save and Exit”.

Step 7: Run the Pipeline
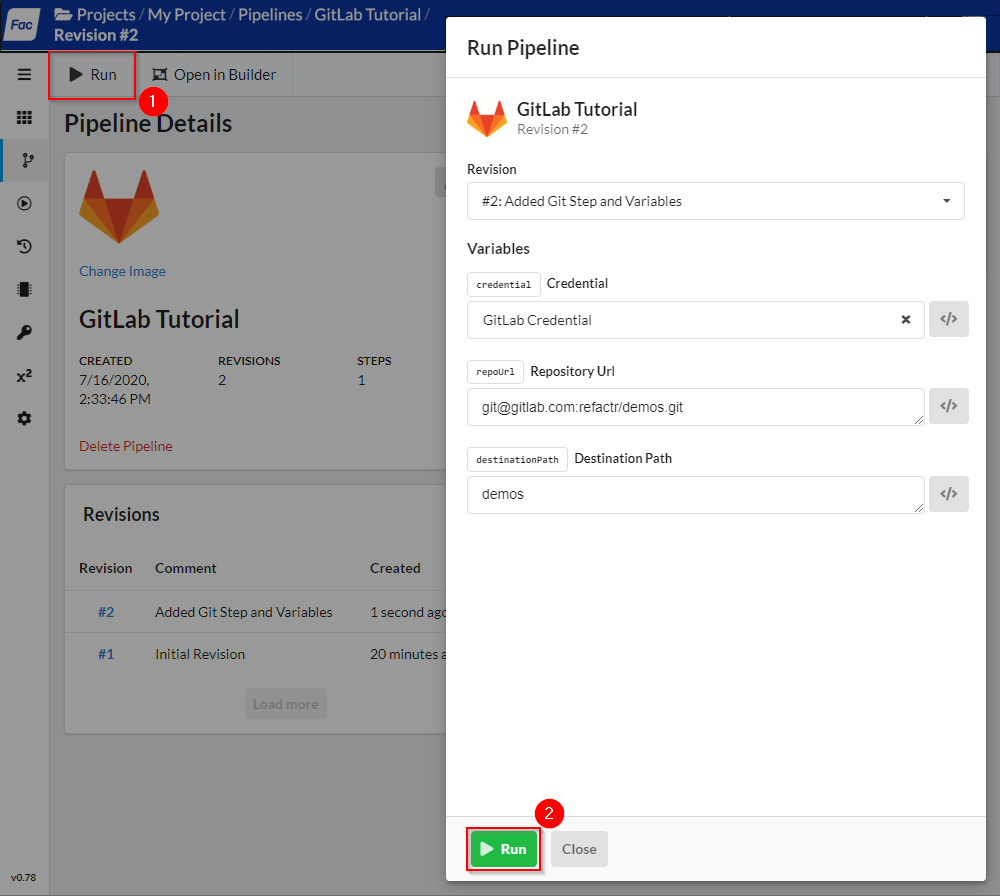
Click “Run” at the top left of the pipeline and the “Run” dialog will appear. Update any variable values as needed, and then click the button “Run” again at the bottom.
Step 8: Monitor Run Progress
After clicking Run, you should see the current run in progress. You can see the console output of the selected run. If the run was successful, you should see a green check mark on the Git step to the left and some positive console output (as seen below).
